Welcome to my third and final post on my practices for shooting in low light using only available light. This post addresses the low light post-production practices I use to get great shots in extremely low light without using flash or strobes.
Get the whole series here in a cool PDF download. All the kids are doing it. Just enter your info below.
[wd_hustle id=”low-light-guide” type=”embedded”]
Be sure to read the first post for an introduction to the benefits of available light photography and a review of the type of gear I use to get great shots in low light. Then read the second post about the low light techniques I use while shooting.
Keep it Real
This is my tag line for commercial photography, so you’ll need to get your own. My first priority when editing photos is to make the scene appear as it did when I took the image. I don’t use filters or Lightroom presets and I definitely don’t photoshop as a verb. I am a photojournalist by training and I use the same principles as the photojournalism community in maintaining honesty and accuracy. My images are intended to be a part of the historical record, documenting a time and place in the world.


“As I Saw It”
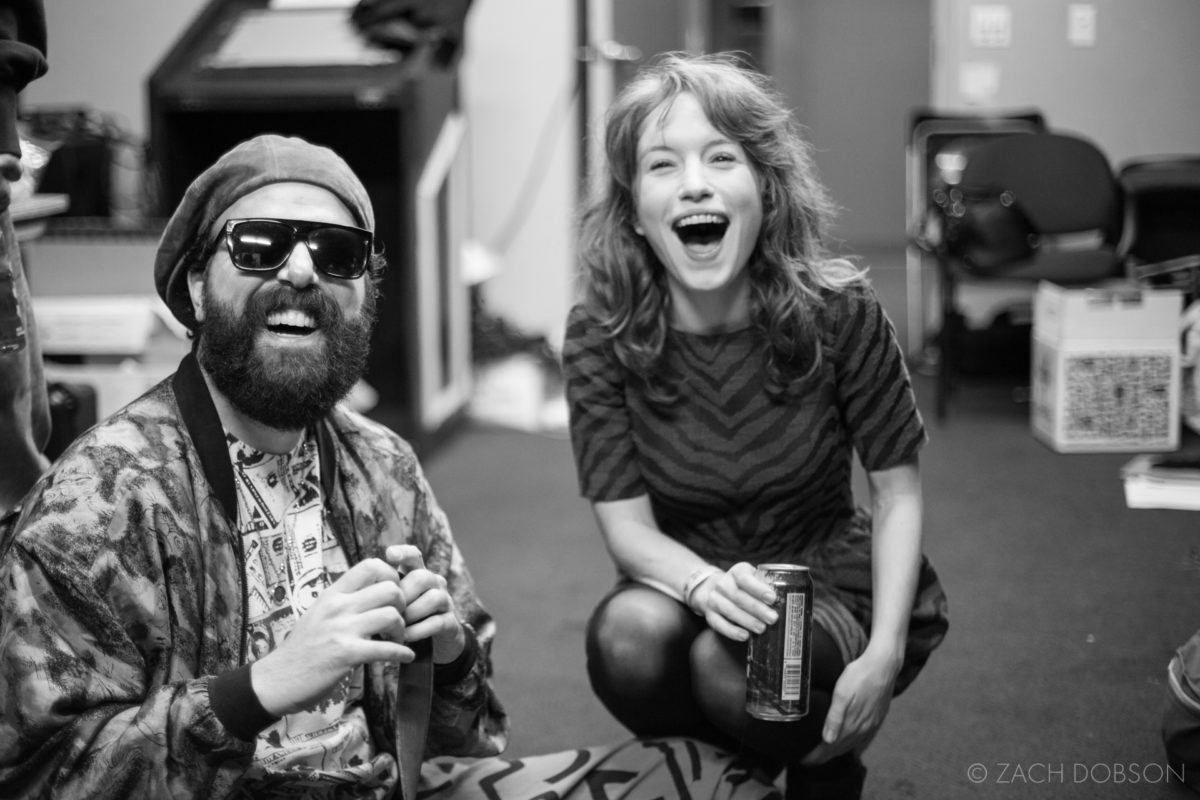
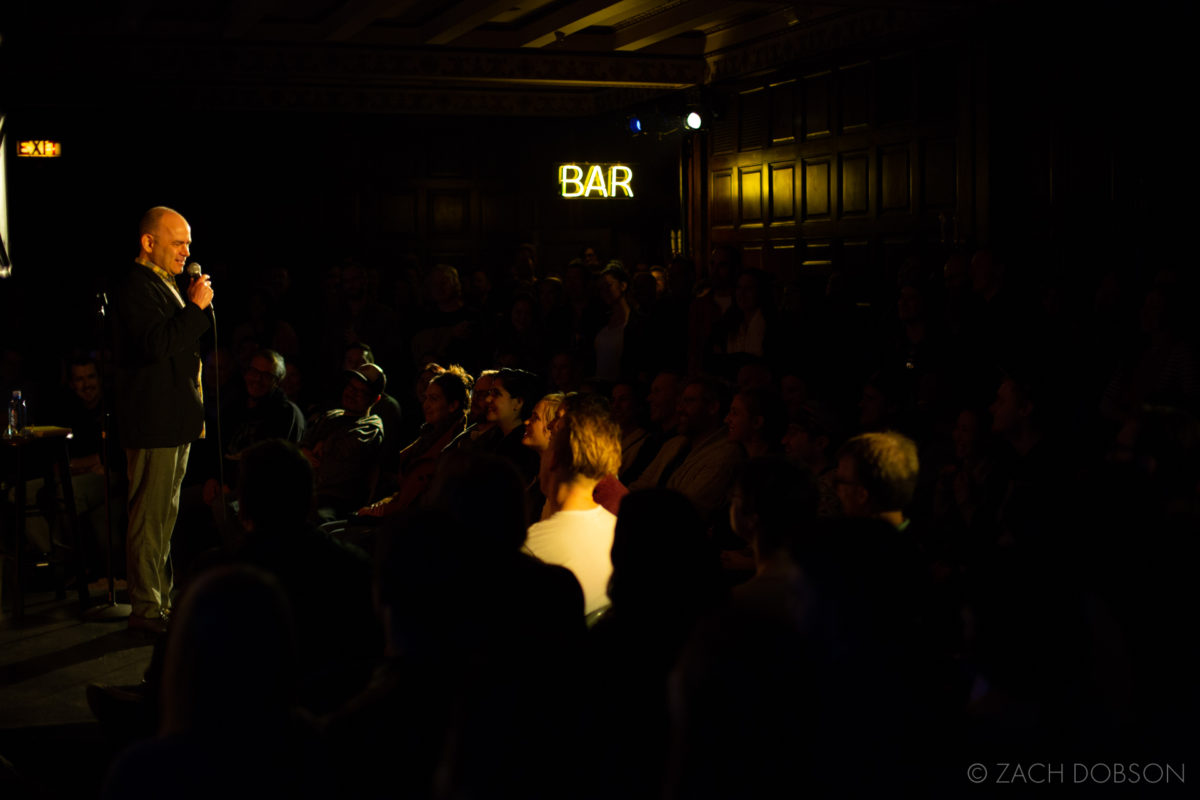
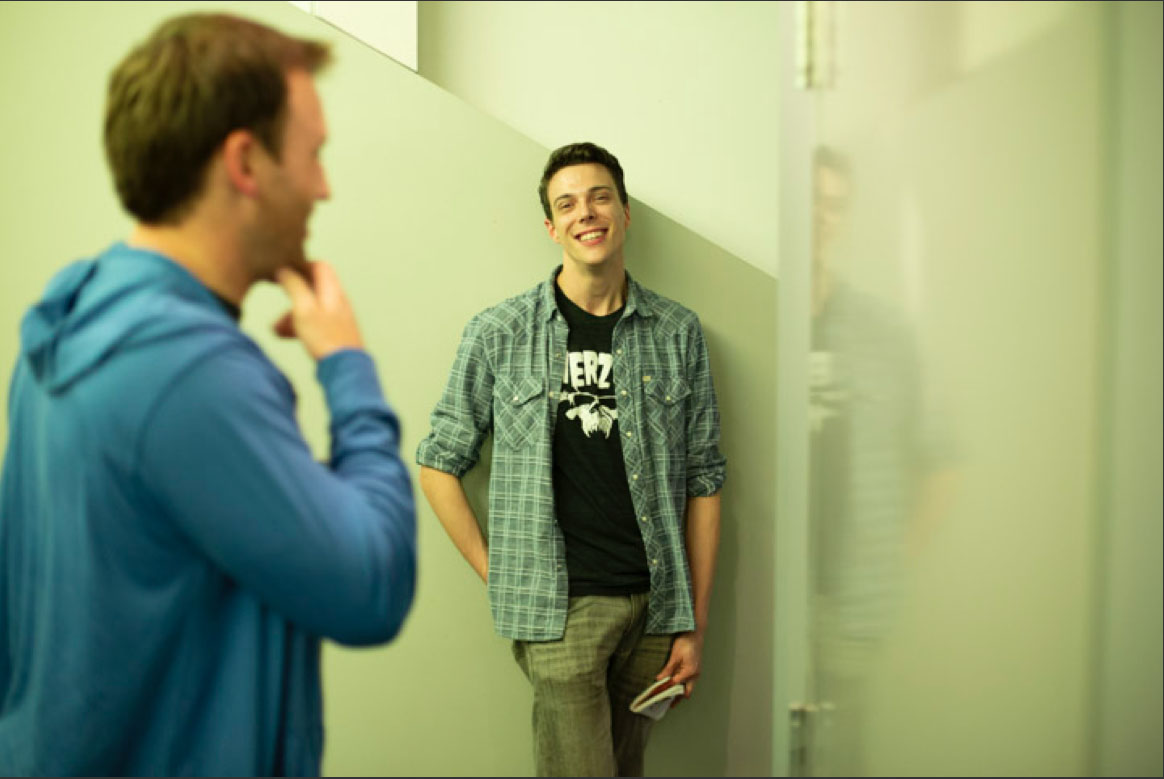
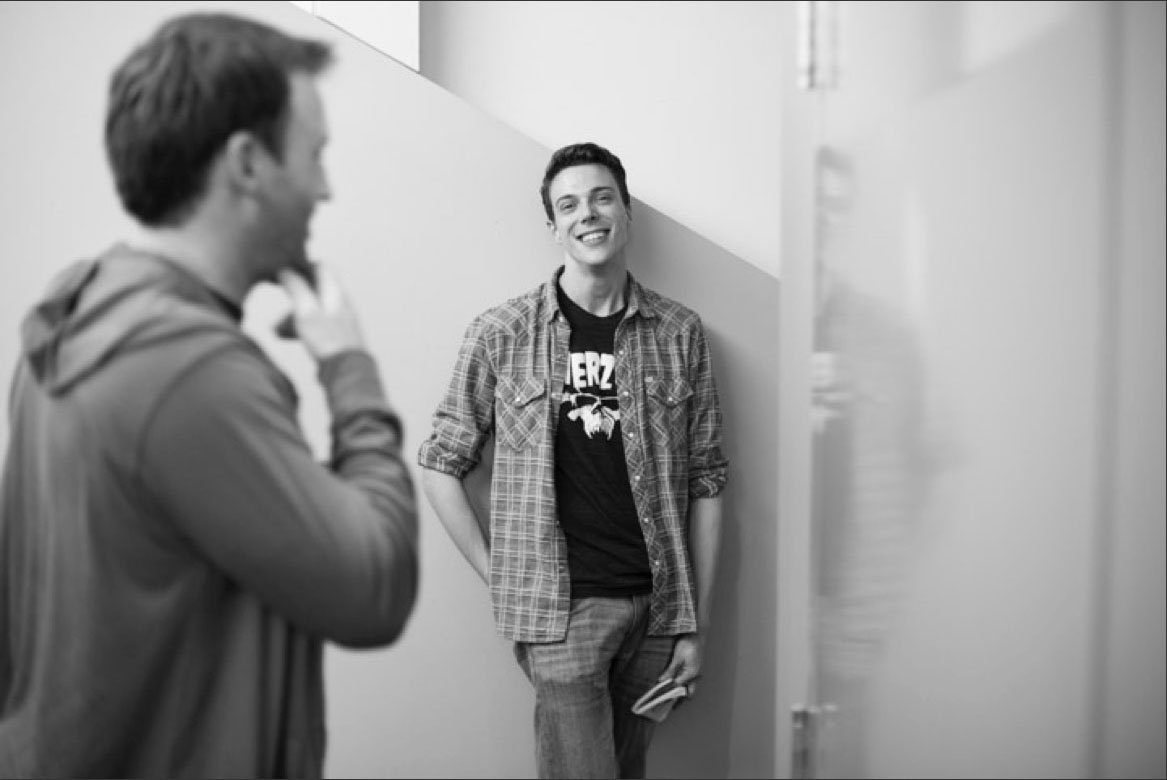
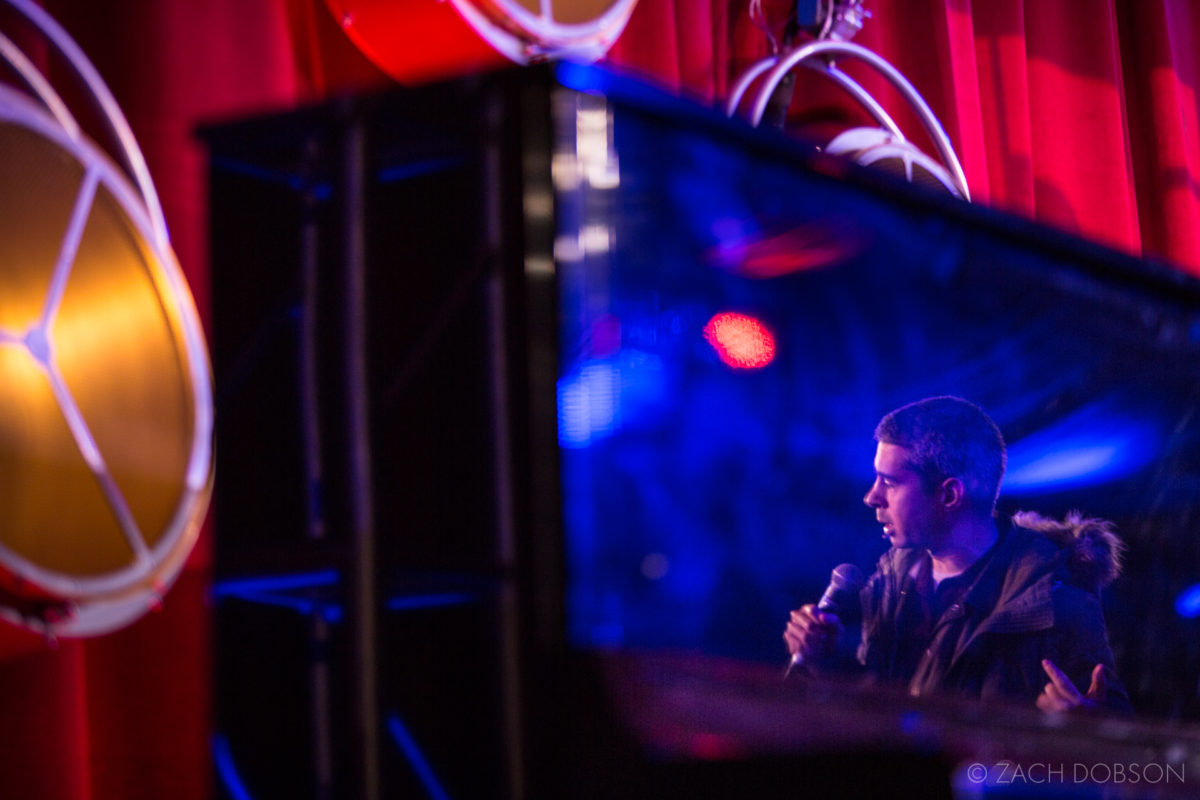
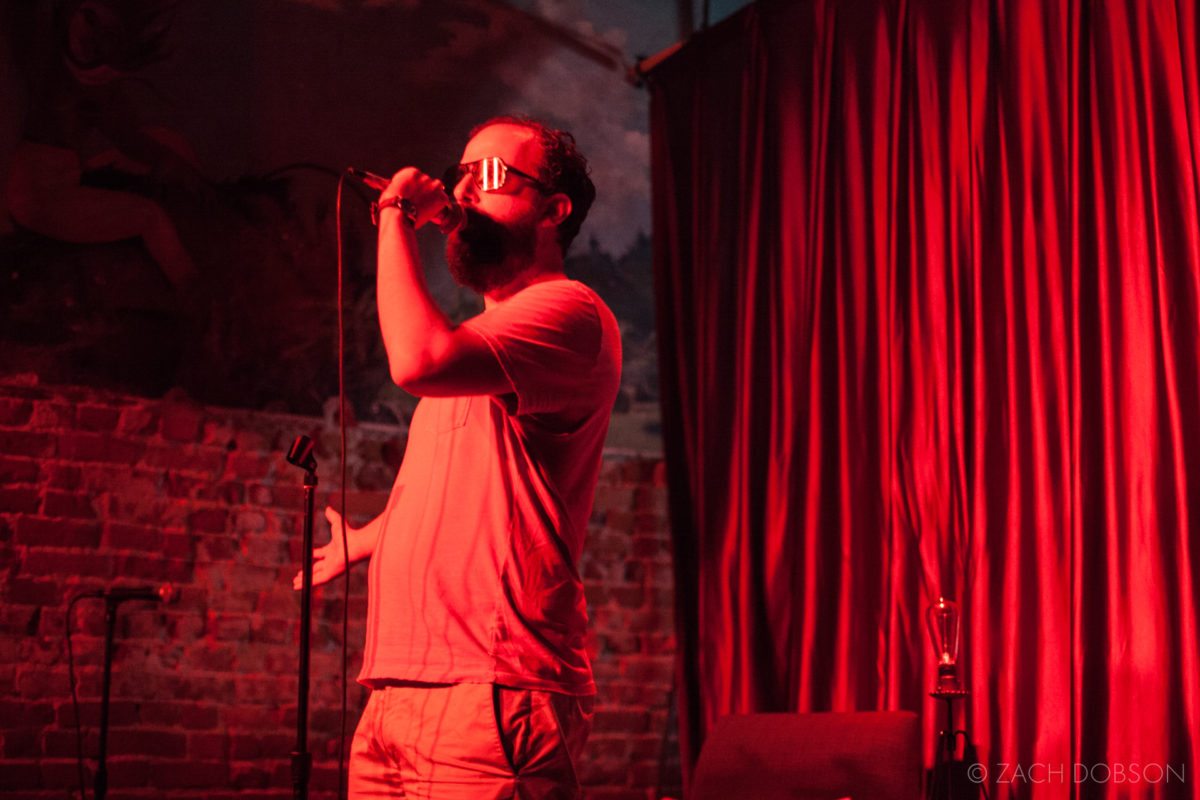
When I say I want the scene to appear as it did when I took the image, I mean I want the scene to appear as I saw it, not exactly how the camera captured it. I always keep that in mind for low light post-production. A camera isn’t the same as the human eye. We can see a greater spectrum of tones than the camera can capture in one frame. So when I photograph a performance and expose for the stage, the audience is very dark, but that’s not how my eye perceived it in the moment. I could see the crowd as well. So I’ll bring some of the crowd detail out of the shadows to better represent what I saw with my eyes.
The two images below are a good representation of what I’m describing. The image on the top is completely unedited, the way it came out of the camera. The image on the bottom is edited to my standard of “how I saw it.”
Color VS. Black & White
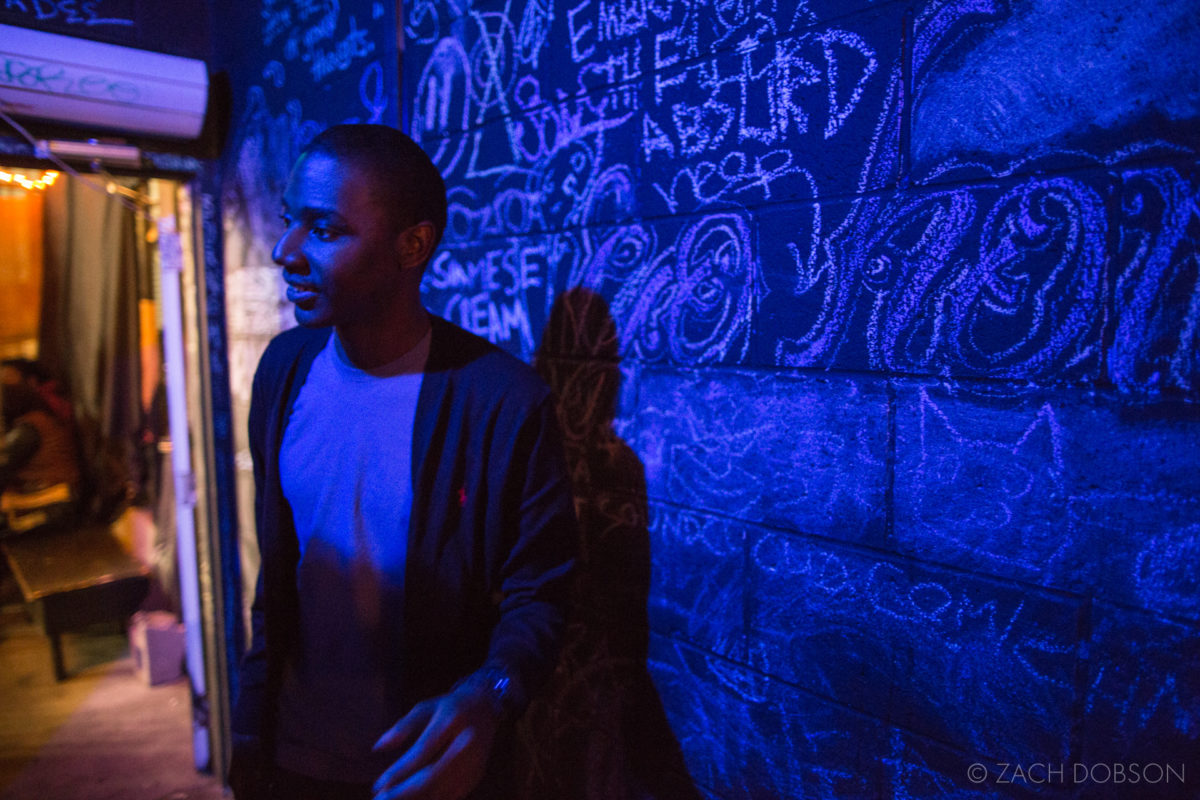
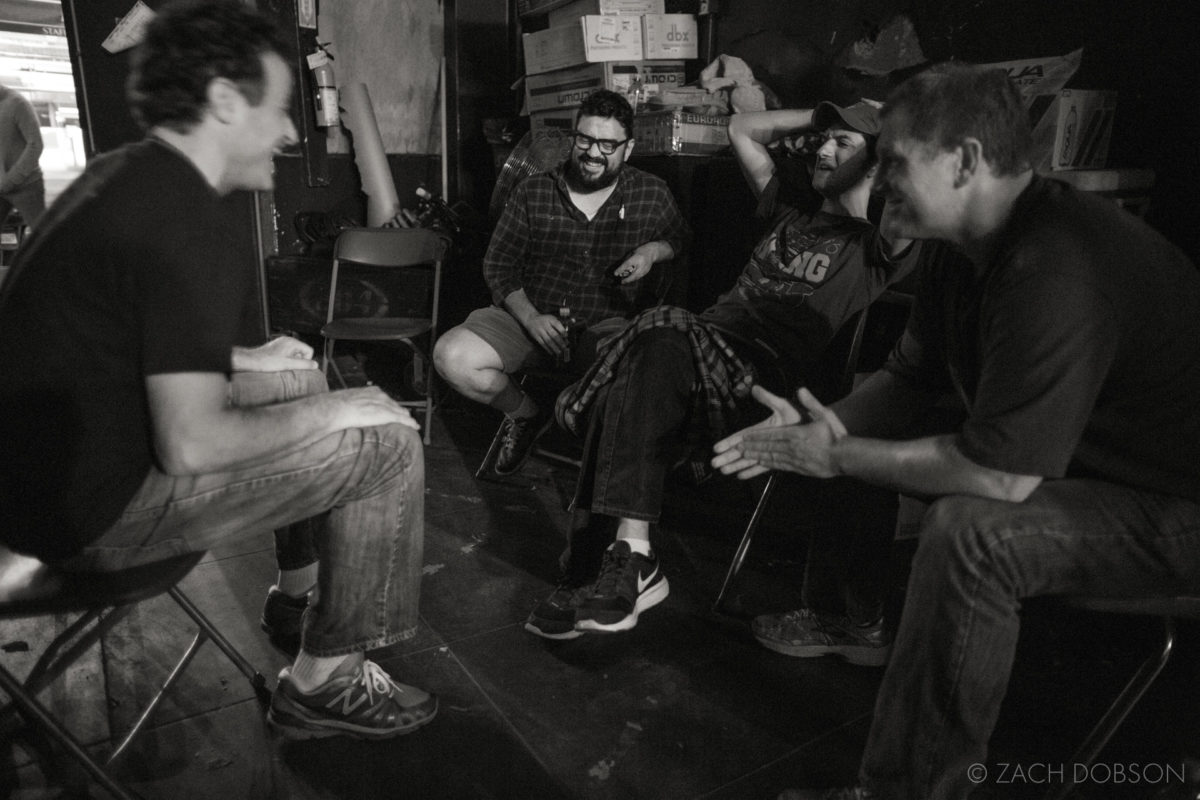
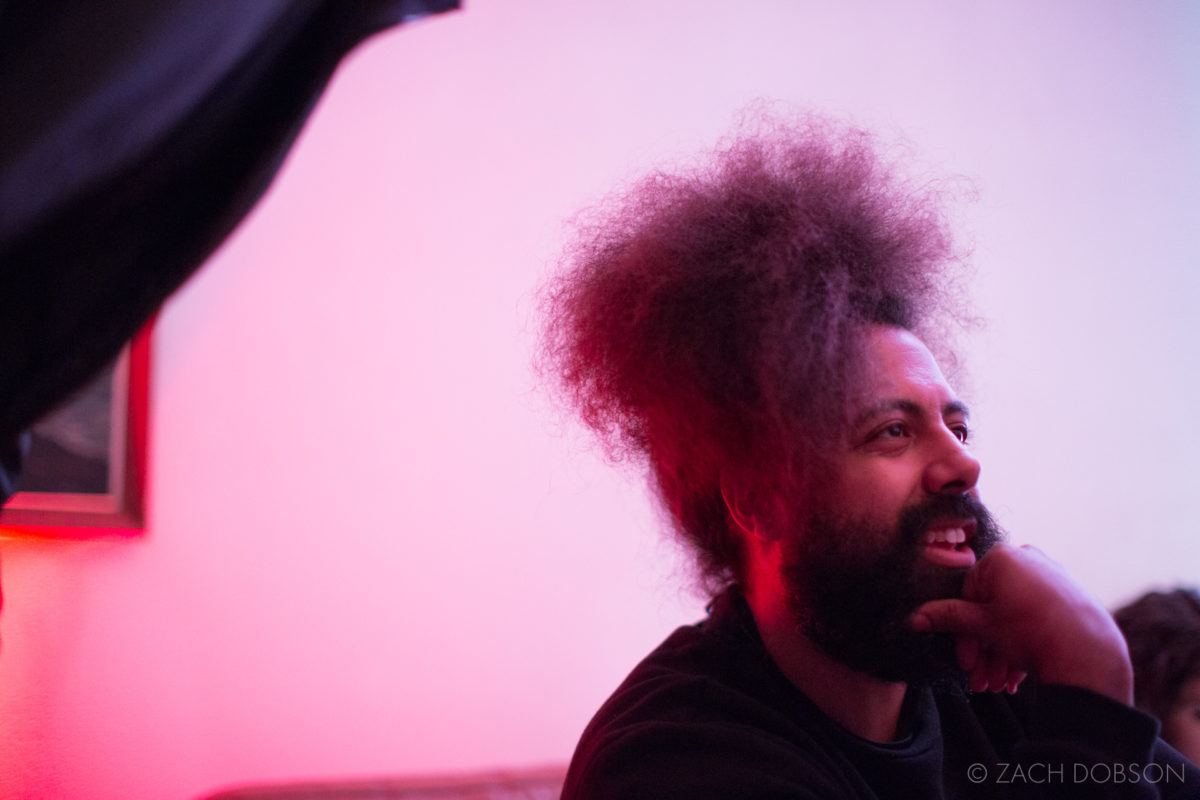
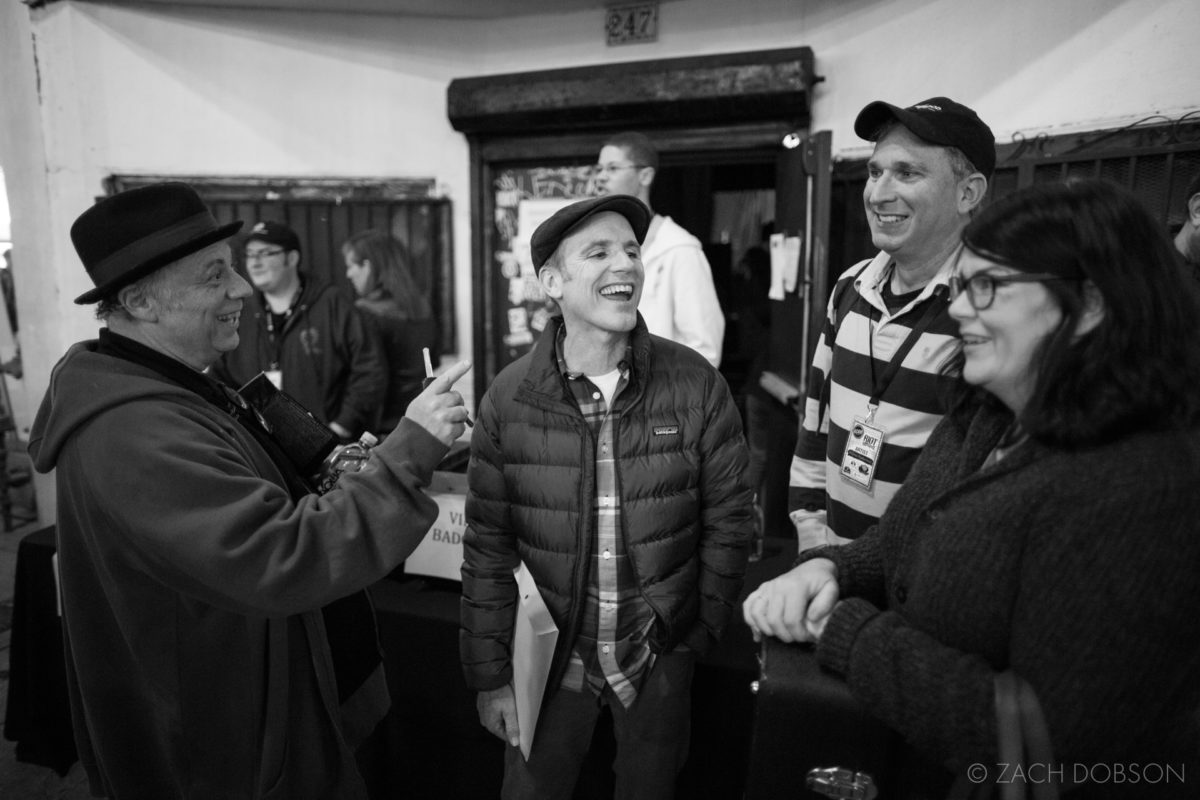
Everything I shoot is in color. I’d rather have the option of converting to black & white later than making that decision in the moment. I don’t have a general rule about what ends up color or B&W; it’s more of a gut feeling. The easiest consideration for me when making this decision is if I find the color distracting from the essence of the image. When a nice moment is muddled by green fluorescent light (see image below), I switch it to B&W. If a bold color in the background draws the eye away from the focus of an image rather than adding to it, I switch to B&W.
When I’m going to use color, I want it to convey the ambiance of a place or add to the story in some respect. When the color doesn’t accomplish that, I’ll convert to B&W.
Lightroom
I do 98% of my post-production work in Lightroom. It’s great software for tagging, marking, organizing and editing images. I could do a whole series of posts on Lightroom, and maybe someday I will. For today, I’ll focus on some of the Lightroom features I use when editing my low light photos. Most of these low light post-production principles will work with whatever editing software you’re using, even if it’s not Lightroom. I’m sure some specifics will differ though.
As a reminder from the second post, I’m always working with RAW image files. They offer the most latitude in tone and color adjustments, which is especially important when using images that were shot in extremely low light.
Tone
First, I make sure the brightness on my screen is all the way up. It’s basic, but an easy thing to forget! As previously stated, I want the scene to look as I saw it in the moment.
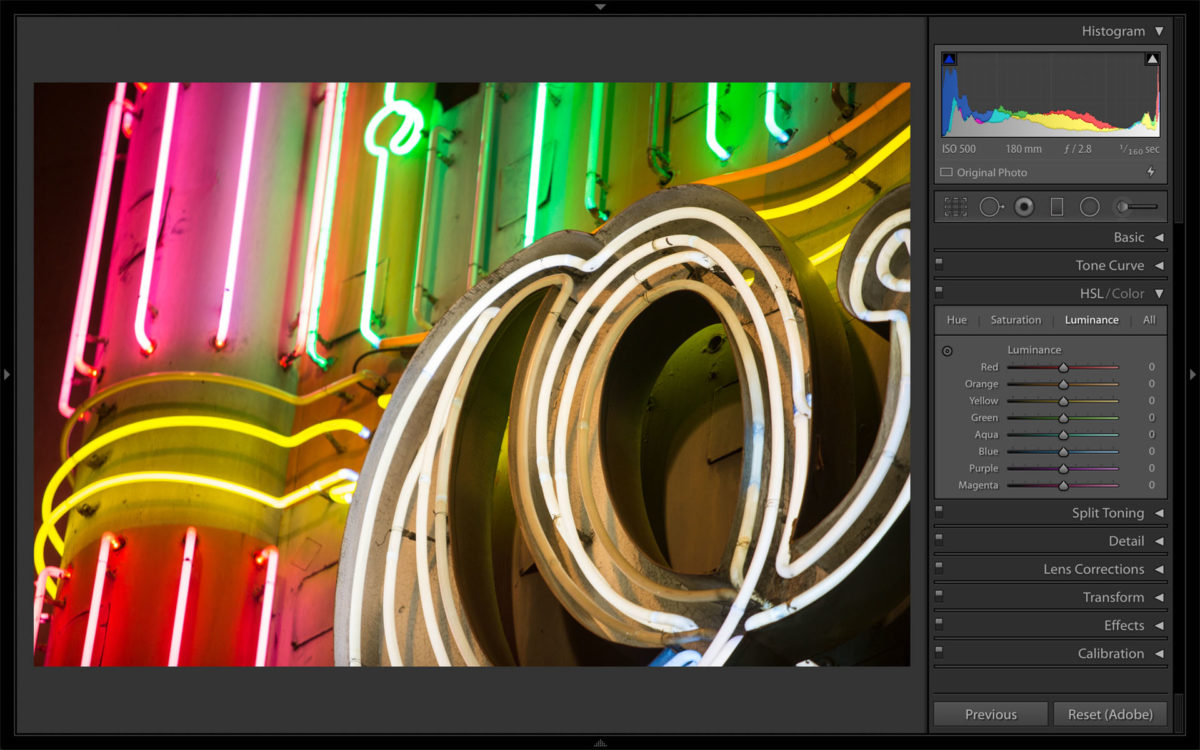
The Histogram
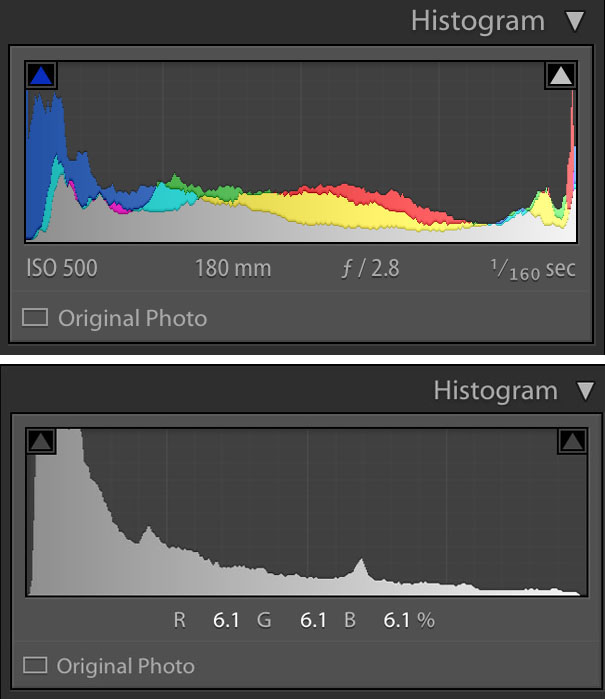
I watch the histogram to make sure I have the full range of tones in the photo. The right side is whites and the left is blacks. To the right you’ll see sample histograms from two images. The top is a color image and the bottom is B&W.
Clipping
“Clipping” is when some of the whites are so bright, or the blacks are so dark, that there is no visible detail in them. When the histogram goes off the right or left side of the image, you have clipping. The histogram on top has clipping for both blacks and whites. The bottom histogram has no clipping. Sometimes clipping is unavoidable. If you have a bright spotlight, of course you’re not going to have any detail in that. And definitely when you’re in a very dark room, some of the shadows are going to be too dark to contain any detail.
If the histogram doesn’t have the full range of black and white, it won’t have much contrast to it. So, when I’m shooting in low light, it is usually weighted more towards the blacks. I look to increase the exposure until some of the histogram reaches closer to the white side.
For my style, I like the image to have contrast, but not too much. I work to bring out some detail in the shadows, but just slightly. Mostly, I go by feel to get it where I want it, which is how my eye saw it in the moment. I don’t want my images to look HDR (High Dynamic Range. I will NOT get into that. Google it if you’re curious.)
Luminance
When editing in Lightroom in the “develop” module, on of the boxes is “HSL/Color”. HSL is for hue, saturation and luminance. I find luminance most helpful. I can make the individual colors brighter or darker by using the sliders.
For example, skin tones often contain a lot of orange in them (regardless of ethnicity), so when I slide the orange up and down, it will take those tones up and down. I pay close attention to anything else in the photo that’s orange-ish because it will change brightness as well. Also, it’s easy to slide it too far, so just watch that everything still looks balanced. I typically don’t go more than +/- 20. This also works with colored light sources. So if a person was lit by blue light, I need to slide the blue slider to adjust the brightness.
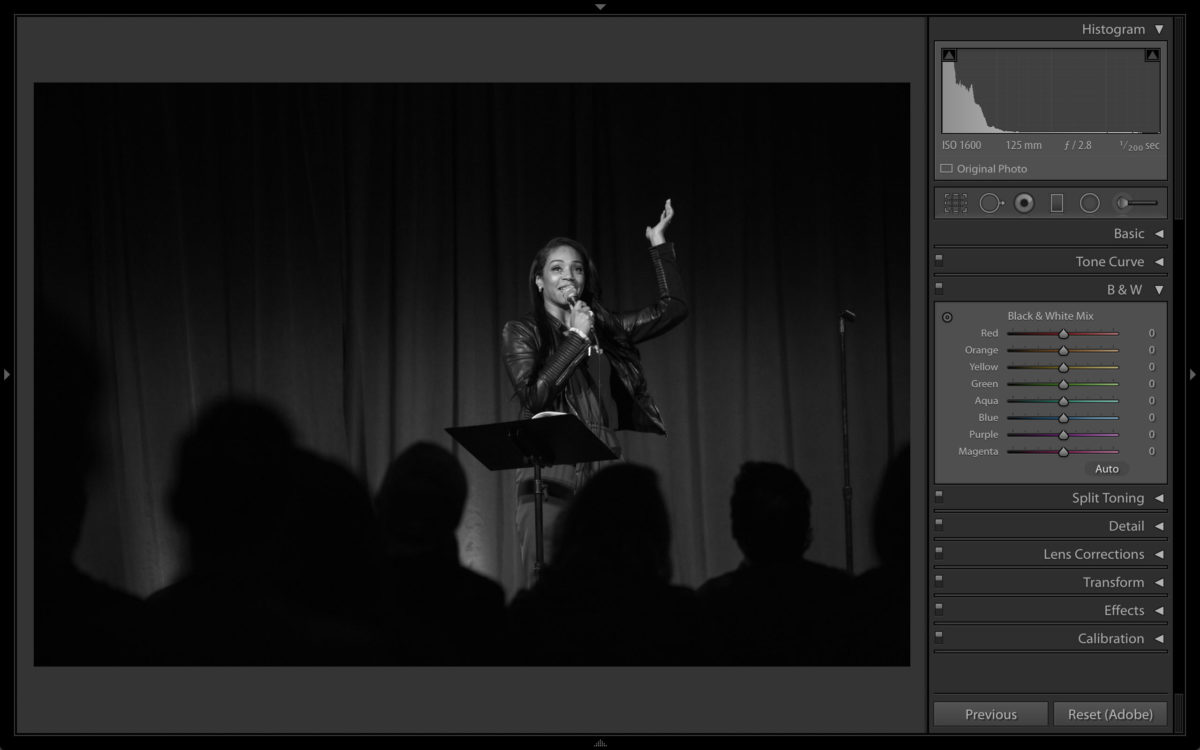
B&W Mix
A breakthrough for me in low light post-production for B&W images in Lightroom was discovering the “Black & White Mix” functionality. When shooting an image in color and converting to B&W in Lightroom, it retains the color information underneath. Use the slider to adjust the brightness of certain colors.
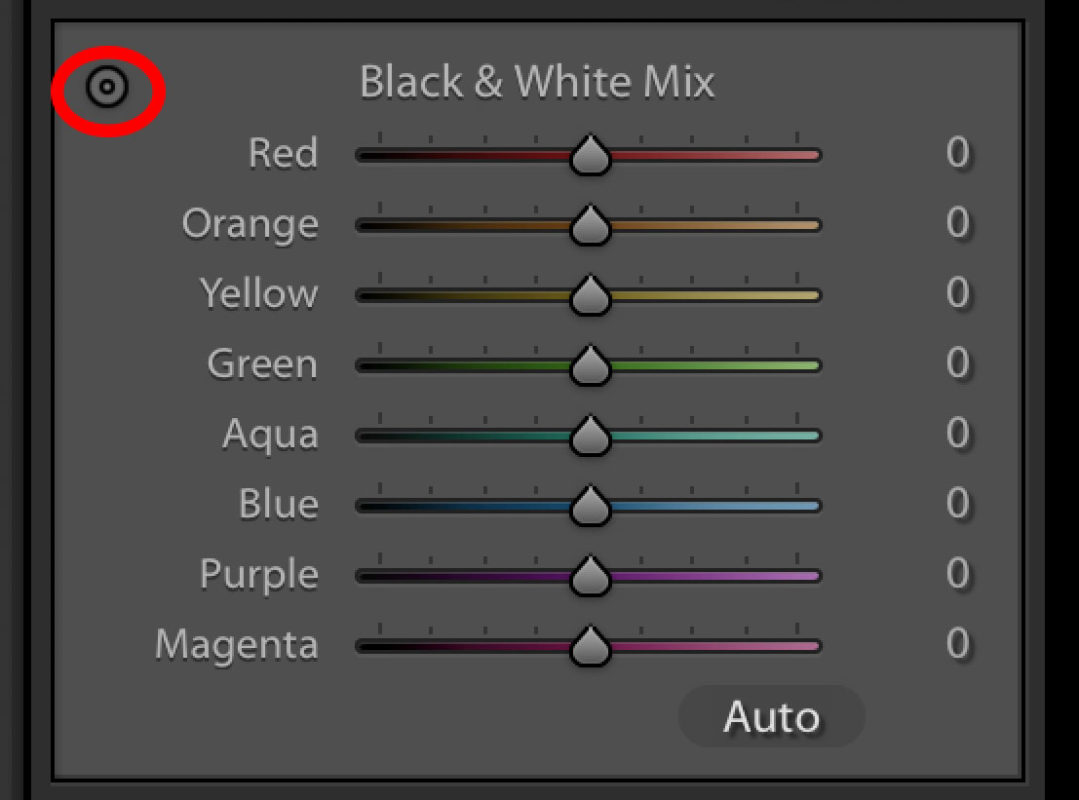
SUPER ADVANCED PRO TIP: Adjusting the mix with the tool tip. This is very cool. First, I click on the little circle in the upper left corner of the “Black & White Mix” box. Then I can hover the tool tip on the part of the photo I want to adjust. Clicking and holding then dragging the mouse up and down makes that color brighter or darker. This works even better than adjusting the individual sliders because sections of the photo are made up of more than one color. For example, skin tones aren’t just orange. They can be a mix of orange and red or yellow. So when I drag up or down on someone’s face, it will adjust each color in proportion to how much of it is present. NOTE: This also works with color images in using luminance.
I’m not sure which other software might offer this feature. If you know, leave a comment.
White Balance
A huge benefit of shooting RAW files is to adjust the white balance of image using a combination of color temperature and tint. This is allows for much more subtle adjustments than working with a jpg. As I mentioned in the previous post, the RAW image is uncompressed so adjusting the white balance while editing does not affect the image quality at all.
With low light post-production, I’ll try the “auto” white balance setting in Lightroom to see what it gives me. Sometimes I like it and keep it. Many times it gets me close and then I can make custom adjustments from there. Occasionally it’s just way off and I immediately “undo”.
For low light post-production, and any other editing I do, I work to keep the color as I saw it. If I don’t like the color of the light in an image, rather than changing the white balance so much that it looks like it was shot in different lighting, I’ll make the image B&W.
Shooting in dark places using only available light often leads to very saturated colors. When at a show or a bar, there can often be very strong colored lighting. If the subject isn’t too close to the light source, it can make for really cool colors in the image. However, if a colored light is especially strong, a subject close to the light source can be saturated to the point of losing detail. In those cases, again, I’ll make the image B&W. It’s always surprising to see the detail emerge when the color is stripped away in these cases.
Wrap Up
Low light post-production takes some practice, but once you find what works best for you, it can take your photography to another level. This concludes my series of three posts on using available light in low light situations. I hope you enjoyed it and maybe learned something, if only that I like to talk about low light photography. As always, please share this with your photog friends if you think they could use it. And if you’d like to have the whole series to refer back to, you can download the PDF guide through the form below.
[wd_hustle id=”low-light-guide” type=”embedded”]
Get my gear recommendations for low light photography here.
Learn the tips and techniques I employ while shooting in low light.
If you have something to add to the discussion, please contribute by leaving a comment below. And if you have any questions, be sure to ask in the comments and I’ll answer them soon.
Thanks! If you take any images using these techniques, tag the photos with #ZDPphototips. I look forward to checking them out!
-Zach
2 thoughts on “Low Light Photography: Post-Production”